
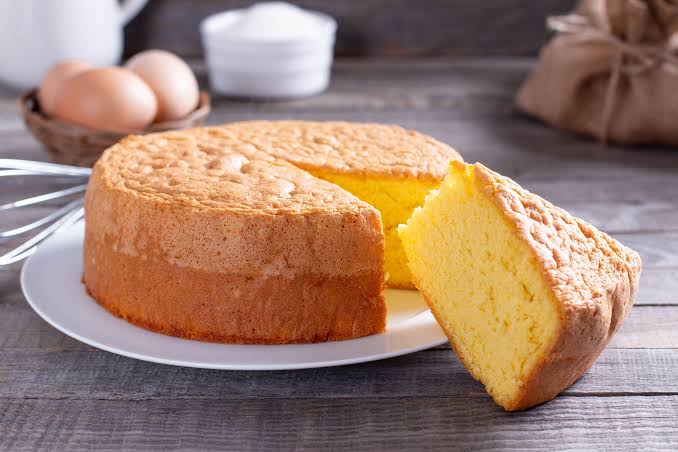
A beautifully prepared layer cake is more than a collection of soft cake layers and delicious fillings. Its true appeal comes from the perfect balance of moisture, flavor, and texture in every bite. One of the simplest ways to achieve this balance is by soaking your biskvitas with a carefully prepared liquid before assembling the cake. Whether you are creating a traditional celebration cake, a creamy dessert, or an elegant European-style confection, learning how to soak biskvitas correctly can transform an ordinary sponge into a rich and memorable treat.
The key is to add enough moisture to enhance the cake without making it soggy or causing the layers to collapse. With the right soaking liquid, technique, and timing, you can create a dessert that tastes delicious and holds its shape beautifully.
Understanding Why Biskvitas Needs Soaking
Biskvitas is known for its light, airy texture and delicate crumb. These qualities make it an excellent foundation for layered cakes because it absorbs flavors easily and pairs well with creams, fruit fillings, chocolate, and other ingredients.
However, sponge cakes can sometimes become dry, particularly when they are baked in advance, stored in the refrigerator, or prepared with a recipe containing little fat. Soaking helps restore moisture while introducing additional flavor.
A well-soaked layer should feel tender and moist without becoming wet or heavy. The liquid should spread through the crumb gradually, allowing each slice to remain soft while supporting the weight of the filling and the layers above it.
Soaking also provides an opportunity to customize your cake. A simple sugar syrup creates sweetness, citrus syrup adds freshness, and coffee syrup gives the dessert a deeper flavor. Choosing the right liquid allows you to complement the other ingredients without overwhelming the delicate taste of biskvitas.
Choosing the Best Liquid for Soaking
The ideal soaking liquid depends on the cake’s flavor profile, filling, and intended occasion. You do not need an elaborate mixture to achieve excellent results. Simple ingredients often work best.
Classic Sugar Syrup
Sugar syrup is one of the most reliable choices for layer cakes. It is easy to prepare, stores conveniently, and adds moisture without introducing a strong competing flavor.
To prepare it, combine equal parts granulated sugar and water in a saucepan. Heat the mixture gently until the sugar dissolves completely. Allow the syrup to cool before applying it to your cake.
You can use this basic syrup for vanilla, fruit, chocolate, and cream-filled cakes. Its neutral sweetness makes it especially useful when you want the flavor of the sponge and filling to remain the main attraction.
Vanilla-Infused Syrup
Vanilla syrup is ideal for cakes featuring whipped cream, pastry cream, berries, or buttercream. Add a small amount of vanilla extract or vanilla bean to your cooled or gently warmed syrup.
The result is a fragrant soaking liquid that gives biskvitas a more rounded flavor. Use vanilla carefully, especially when the filling already contains vanilla, to avoid making the finished cake taste overly sweet or one-dimensional.
Citrus Syrup
Lemon, orange, and lime syrups work particularly well with fresh fruit, yogurt-based creams, and light summer desserts.
Prepare a simple sugar syrup and add a little finely grated citrus zest while warming it. You can also incorporate a small amount of strained juice, adjusting the sugar to balance the acidity.
Allow the mixture to cool before use. Citrus syrup adds brightness and helps balance rich fillings, creating a cake that feels flavorful without being excessively heavy.
Coffee and Chocolate Syrups
Coffee syrup is an excellent option for cakes layered with chocolate ganache, mascarpone cream, or mocha frosting. Brew strong coffee, combine it with sugar, and stir until dissolved.
For chocolate cakes, you can also use lightly sweetened cocoa syrup. These liquids deepen the flavor of the sponge and make the finished dessert taste more complex.
Choose a syrup that complements the filling rather than competing with it. A chocolate sponge with coffee cream, for example, benefits from coffee syrup, while a berry-filled cake usually works better with vanilla or citrus.
Preparing Biskvitas Before Soaking
Proper preparation is essential for even absorption. Begin by allowing your freshly baked biskvitas to cool completely. Applying syrup while the cake is hot can make the crumb fragile and cause excess moisture to collect in certain areas.
If you plan to create a tall layer cake, level the sponge carefully with a serrated knife. Cut it into evenly sized layers so that each section absorbs the syrup at a similar rate.
Place the layers on a clean work surface, cake board, or large plate. Keep your soaking liquid in a small bowl or squeeze bottle for easier application.
Check the texture of the sponge before proceeding. A particularly airy biskvitas may absorb liquid quickly, while a denser sponge may require slightly more. Understanding the cake’s structure helps you avoid applying too much syrup.
The Correct Technique for Soaking Biskvitas
The most important principle is to apply the liquid gradually. Pouring a large amount of syrup over the sponge at once can create wet patches, weaken the structure, and make assembly difficult.
Use a Pastry Brush
A pastry brush gives you excellent control over the amount of liquid applied. Dip the brush into the cooled syrup and gently spread it across the surface of the sponge.
Begin around the edges, then move toward the center. The outer portions of a cake can dry out more quickly, so careful coverage helps maintain a consistent texture.
Apply a thin layer, wait briefly, and check how much liquid the sponge has absorbed. Repeat only if the cake still feels dry. The surface should look slightly moist rather than shiny with standing liquid.
Try a Squeeze Bottle
A squeeze bottle is useful when preparing several layers or working with a large cake. Dispense small amounts of syrup in a controlled pattern across the sponge.
Move the bottle evenly over the surface instead of concentrating the liquid in one location. Follow with a pastry brush if necessary to distribute the syrup more evenly.
Avoid pouring directly from a jug because it is difficult to control the quantity and coverage.
Measure According to Texture
There is no single soaking quantity that works for every biskvitas recipe. A thin sponge layer may need only a small amount, while a thicker or slightly drier layer may absorb more.
Start conservatively and increase the amount only when needed. The cake should remain flexible enough to lift and stack without tearing.
Remember that the filling also contributes moisture. Whipped cream, fruit compote, custard, and other soft fillings can continue moistening the sponge after assembly.
Common Mistakes to Avoid
One of the most frequent mistakes is oversoaking. Too much liquid can turn the delicate crumb into a mushy layer that slides under the filling. It may also cause the finished cake to lose its shape when sliced.
Another mistake is using syrup that is too warm. Warm liquid can soften the sponge unevenly and create a fragile texture. Always allow the soaking mixture to cool to room temperature.
Using an excessively sweet syrup can also affect the final result. If your filling contains sweetened cream, jam, or caramel, reduce the sugar in the soaking liquid to maintain balance.
Do not rush the process by soaking every layer heavily at once. Apply the syrup in small amounts and allow time for absorption. Finally, avoid assembling the cake while the layers are unstable or excessively wet.
Assembling and Resting Your Layer Cake
Once the biskvitas has absorbed the syrup, spread your chosen filling evenly over the surface. Keep the filling slightly away from the outer edge if you are using a soft cream that may spread under pressure.
Position the next sponge layer carefully and repeat the soaking and filling process. Check that the cake remains level as you build its height.
After assembly, refrigerate the cake if the filling requires refrigeration. A resting period of several hours, or overnight when appropriate for the recipe, allows the flavors to blend and the moisture to distribute more evenly.
Cover the cake to prevent it from absorbing refrigerator odors or drying out. For the cleanest slices, use a sharp knife warmed briefly in hot water and wiped dry between cuts.
Conclusion
Soaking biskvitas is a simple technique that can significantly improve the taste and texture of rich layer cakes. By selecting a complementary syrup, allowing the sponge to cool completely, applying liquid gradually, and avoiding excessive moisture, you can create layers that are tender, flavorful, and easy to assemble.
Experiment with classic sugar syrup, vanilla, citrus, or coffee to discover combinations that suit your favorite fillings. With practice, you will learn to recognize exactly how much moisture your sponge needs.
The secret to an exceptional layer cake is not soaking the biskvitas as much as possible. It is finding the right balance between softness, flavor, and structure. Master that balance, and every slice can deliver a moist, delicious, and beautifully layered dessert.